Showing posts with label holidays. Show all posts

Tuesday, January 3, 2012

Christmas Gifts #2 - Explosion Box


I started my mom's gift months ago. A friend had shown me pictures of GORGEOUS explosion boxes that she had made and I was ready to try my hand at it.

I used Bo Bunny's Welcome Home collection for the box. I generally don't stick to "collections" when I do things, but this was such a huge undertaking, I thought starting out with everything that coordinated was a great idea :-)

I was excited to make the box interactive for my mom. There are tags to pull out with words and pictures inside. Some of the extras were "hinged" with brads so that they could be pulled aside.

I made the flower out of one of the patterned papers and one of the coordinating colors I bought to go with it. I cut each one 1/4" smaller than the previous, and used the end of my Xacto knife to "cup" the flower petals to give it depth.


I used a lot of the beautiful family photos we had taken in October!
It was definitely the Christmas present I was most excited to watch opened this year!

Wednesday, November 2, 2011

Crafty Halloween


My little girl decided she wanted to be Jessie from Toy Story for Halloween this year. My mom never bought my costumes and I always said I wouldn't buy costumes for my kids either, but this one threw me for a loop! Such a detailed character - could I do it justice if I made it myself?

I decided to take some artistic license with it. Instead of Jessie's chaps and jeans, I wanted to make a cute ruffle cow print skirt and a blue tutu.  I haven't ever made a skirt from scratch before, so this was a super challenge!


This ruffle almost got the best of me...  but I won.


I bought a plain white shirt from Walmart for the costume. I had some lemon yellow vinyl lying around and used a craft knife to cut the shape from Jessie's shirt.  Then I hot glued red roping in the design from her shirt.  I sewed some big white buttons on it and (of course I don't have a picture) made a pull ring on her back (shower ring + ribbon!) 


I LOVE the way the bias tape looks in this picture! This is also something I've never worked with, but I couldn't be happier about how it turned out.


Of course, having a Jessie it only made sense to have a Woody too! I was lucky to find the most PERFECT yellow button down shirt at a local resale shop.  I made his vest by tracing a sweater vest that fits him now and adding a few inches for seams. It was a pretty straight forward project, and really the only thing I made for his outfit.  Both belts are made from fun foam!


My little Jessie!


Monday, October 17, 2011

Christmas is coming....

Time to bust out the homemade gift ideas again!  We didn't make this one for Christmas, but it would make a great gift for a grandparent, aunt or uncle!

For Father's Day this year (yes, I'm that behind on my blogging) E and I made Daddy a handprint calendar.
I found the directions HERE. I did change some of the poems for our calendar.
They made SUCH cute little pictures and Daddy LOVES it!


I would have liked to have had more time to coordinate the paper better, but we were on limited time, limited budget and had an infant around who 1) didn't like to sit still while we painted E's hands and 2) wasn't sleeping through the night!
Posted by Picasa

Wednesday, January 5, 2011

Homemade Christmas Part 1

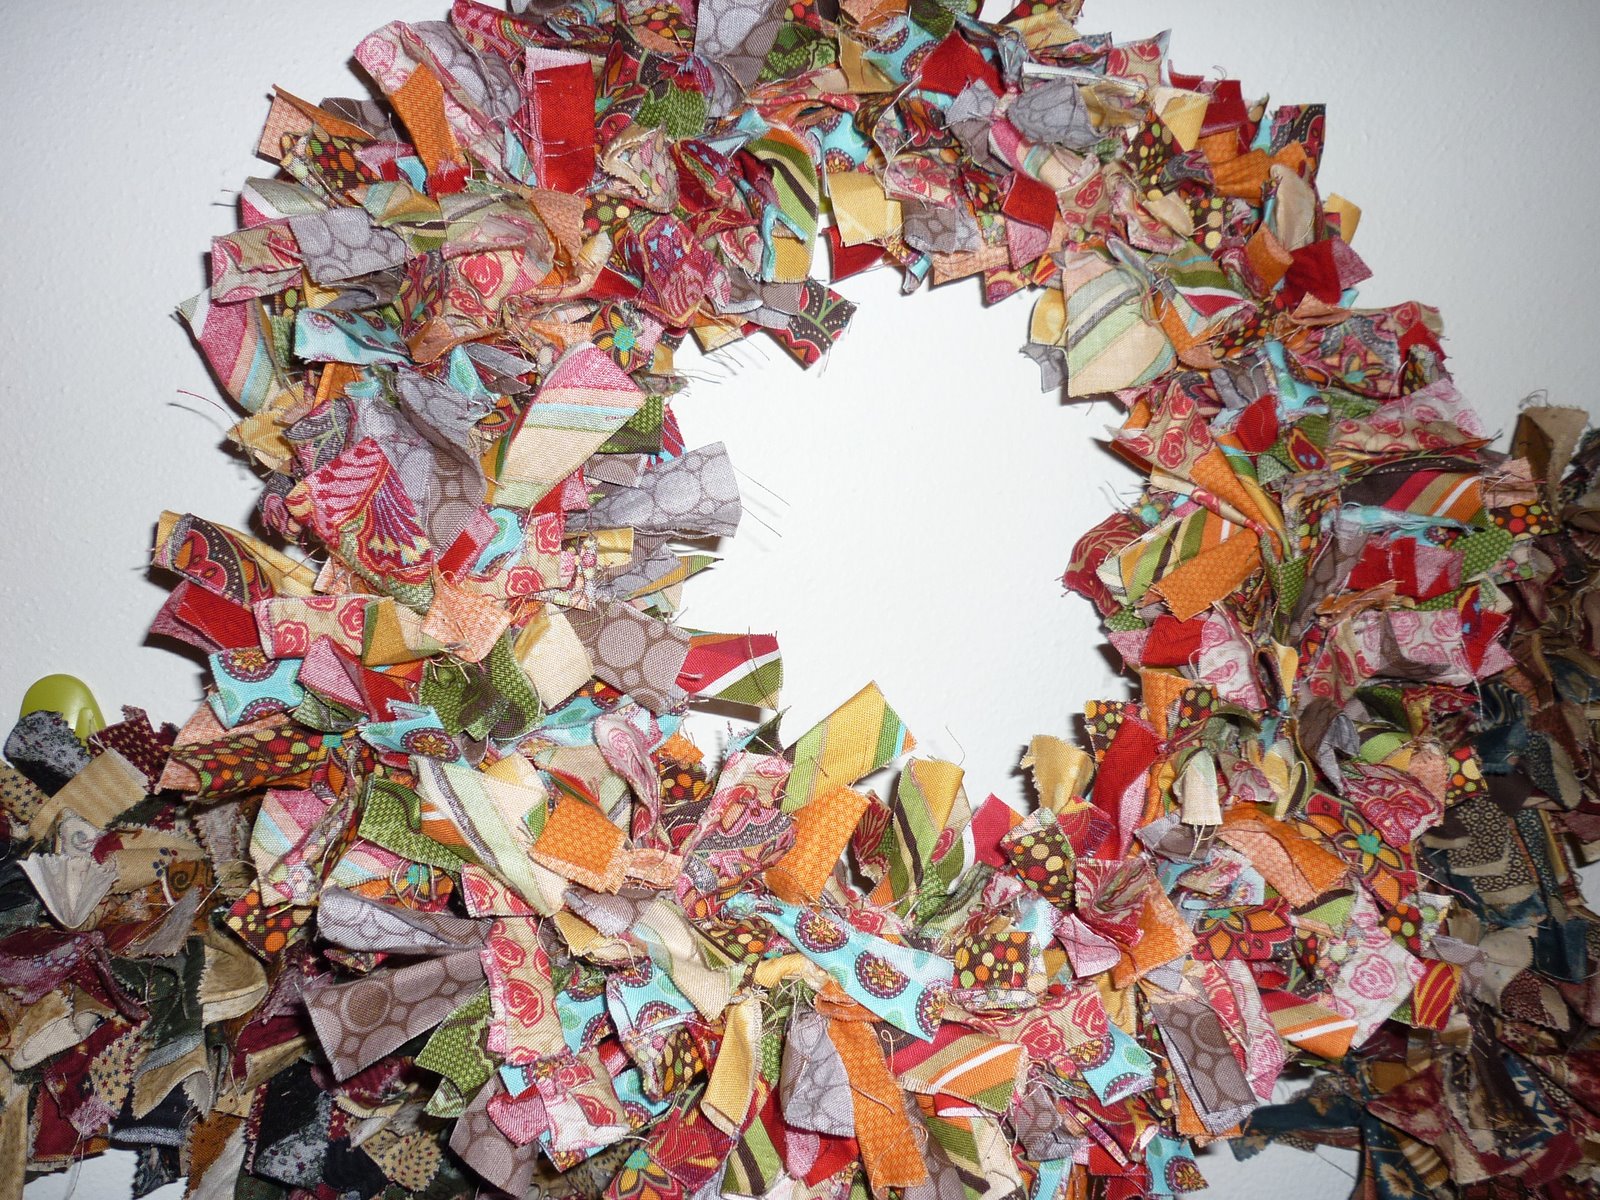
A friend sent me a link to the Moda Fabric Wreath tutorial about 2 weeks before Christmas. And I decided it was a MUST for those "hard to shop for" people on my list! So I set out on a journey to find the honey buns to make them. I wound up ordering three from Etsy and one I found at Hobby Lobby (it was wider, with less variety than the honey buns, but it worked out!) 
These took an average of about two hours.
I had to do math, though, which I'm not good at. I enlisted my husband to assist me in determining how many knots would go in each section.  I had about 320 strips, so it was a lot of math to do. :-)

I think these turned out really beautifully!  

I loved the way they look all set up on my ottoman (there were more on my couch arm!)  I will warn you, though, the honey buns shed like CRAZY! I'm still finding little strings in odd places in my house :-) But it was well worth it!

Sunday, November 28, 2010

Upside Down Apple Pecan Pie

My parents came in from Georgia for Thanksgiving, so I didn't have to cook a thing.
But I still wanted to contribute!

I saw this recipe from the TidyMom blog and knew I HAD to try it!  Mine turned out fabulously - eventually.  I think I had an extra cast iron skillet in the bottom of the oven which messed with the cooking time. The FIRST time I took it out, I had flipped it out onto the pan and realized the apples in the bottom weren't fully cooked yet! So I RE-flipped it, put it back in the oven (without the skillet!) and baked a little while longer.

It was fabulous! Not for the faint of heart, the pecan mixture adds a LOT of sweetness to a normally-tart apple pie.

Thanks to my hubby for the beautiful pictures!

 And my little turkey is officially bigger than the one we cook!  (Last time we did this, she wasn't!)

Upside-Down Apple Pecan Pie 

From TidyMom

Ingredients
1 cup chopped pecans
1/2 cup firmly packed brown sugar
1/3 cup melted margarine or butter
1 box of Pillsbury All Ready Pie Crust
1 tsp flour
6 cups (6 medium) sliced & peeled apples
1/4 cup sugar
2 Tbsp flour
1/2 tsp cinnamon
1/8 tsp nutmeg

Heat oven to 375°F.

1. In 9" pie plate, combine pecans, brown sugar and margarine; spread evenly over bottom of pan.
2. Prepare pie crust according to package direction for two-crust pie (flouring each side of crust).
Place bottom crust over pecan mixture in pan.
3. press crust down around sides of pan.
4. In large bowl, combine apples, sugar, flour, cinnamon and nutmeg. mix lightly.
5. Spoon into pie crust-lined plate.
6. Top with second pie crust, and flute.
7. Cut slits in several places.
8. Place pie plate on cookie sheet and bake at 376° for 40-50 minutes or until crust is golden brown. Cool pie upright in pan for 5 minutes
9. Place serving plate over pie (after cooling for 5 mins)
10. Invert pie, Carefully remove pan. Some nuts may remain in pan, replace on pie with a knife
Cool at least 1 hour before serving.


Thursday, June 24, 2010

I haven't forgotten you!!

I've been busy.  A special little lady turns TWO next week and there have been LOTS of preparations!

We're having two parties, one at "home," where my husband and I grew up, and one here for her little friends.   Since the "home" party will be mostly adults, I didn't really do an over-the-top "theme" but more of a color scheme that matches the outfit she will wear :-)

Here's how my DIY invites turned out:

Front
Inside: (I saw a card in a store hinged like that and fell in LOVE with it!)

Back: (Because how could I pass up an opportunity to share this picture?!)


I'm still working on the banner for that party and the invites for the party for her friends. A sneak peek?  Well, no photos, but the theme will be "If you give a Pig a Pancake" :-)

Thursday, May 20, 2010

Trying my hand at watercolors...

I searched high and low for Mother's Day card ideas and nothing came to me.

Until I bought this stamp with flowers. I wasn't sure what to do with it, but I LOVED where it ended up!

Three different cards. Two I used clear embossing powder on, one is simply stamped and colored.

I am SO pleased with how they turned out!
This is my first try with actually SENDING something that's been watercolored!
I adore this stamp! It will be around a LOT in the future I think!

Posted by Picasa

Sunday, March 21, 2010

Cappuccino TO DIE FOR Cinnamon Rolls

Ok, ok, so I might have added to the recipe title a bit. But they are OH SO DELICIOUS! And I didn't want you to think I'd forgotten about the blog! I've been busy working on some TOP SECRET paper projects, which will be revealed shortly. But until then.....

 I found this recipe in a Taste of Home magazine article last spring.  We tried them on Easter and I was HOOKED!

I won't lie, they are a lot of work. But they're worth every second it takes to make them!

I tried them again when I got my Cuisinart stand mixer for my birthday (one of my top two favorite appliances ever! Thanks Hubby!) Since I didn't intend to make this for a blog, I don't have wonderful photographs of every step. So for today's purposes, it went something like this:
 
Dough after first rise.


Log of cappuccino-cinnamony goodness

Into the oven they go!

Meanwhile, I made the icing. Mmmm icing.

The finished product is a GORGEOUS and huge cinnamon roll!

 
This is a sneaky picture from Easter (hence the Easter basket in the background) but it's just to prove that these *always* turn out beautiful!

And unfortunately I don't have any pictures of them iced because, well, my hands were too gooey and my mouth was too full.   I do, however, have a picture of the Hubby voicing his approval:


Cappuccino Cinnamon Rolls
  • 12 Servings
  • Prep: 45 min. + rising Bake: 25 min.

Ingredients

  • 1 package (1/4 ounce) active dry yeast
  • 1 cup warm water (110° to 115°)
  • 3/4 cup warm milk (110° to 115°)
  • 1/2 cup buttermilk
  • 3 tablespoons sugar
  • 2 tablespoons butter, softened
  • 1-1/4 teaspoons salt
  • 5-1/2 to 6 cups all-purpose flour

  • FILLING:
  • 1/4 cup butter, melted
  • 1 cup packed brown sugar
  • 4 teaspoons instant coffee granules
  • 2 teaspoons ground cinnamon

  • ICING:
  • 2 tablespoons butter, softened
  • 1 to 2 tablespoons milk
  • 2 teaspoons cappuccino mix
  • 1-1/2 cups confectioners' sugar
  • 1/2 teaspoon vanilla extract

Directions

  • In a large bowl, dissolve yeast in warm water. Add the warm milk, buttermilk, sugar, butter, salt and 4 cups flour. Beat on medium speed until smooth. Stir in enough remaining flour to form a soft dough (dough will be sticky).
  • Turn onto a floured surface; knead until smooth and elastic, about 6-8 minutes. Place in a greased bowl, turning once to grease the top. Cover and let rise in a warm place until doubled, about 1 hour.
  • Punch dough down; turn onto a floured surface. Roll into an 18-in. x 12-in. rectangle; brush with butter. Combine the brown sugar, coffee granules and cinnamon; sprinkle over dough to within 1/2 in. of edges.
  • Roll up jelly-roll style, starting with a long side; pinch seam to seal. Cut into 12 slices. Place rolls, cut side down, in a greased 13-in. x 9-in. baking pan. Cover and let rise until doubled, about 30 minutes.
  • Bake at 350° for 22-28 minutes or until golden brown. Place pan on a wire rack. In a small bowl, beat the icing ingredients until smooth. Spread over rolls. Serve warm. Yield: 1 dozen.
Nutrition Facts: 1 roll equals 436 calories, 9 g fat (5 g saturated fat), 22 mg cholesterol, 328 mg sodium, 82 g carbohydrate, 2 g fiber, 7 g protein.